8 GitHub and RStudio
question Questionsobjectives Objectives
- How to integrate version controlling with Git(Hub) in an existing project?
- Creating a version controlled repository from any project in Rstudio
- Understand how to use Git's routine usage functions (stage, commit, push, pull) in Rstudio
time Time estimation: 20 minutes
1. Introduction
Rstudio is a popular platform for downstream data-analysis, statistics, machine learning and more scientific related analysis using the R language. If you’re unfamiliar with R and Rstudio, some materials on this website that will get you started are accesible via this link. Uptil now we have focused on the core principles of Git & GitHub, which gives us enough knowledge to start integrating in other platforms.
There are three plausible scenarios:
- You have a version controlled project on your computer which you want to integrate in Rstudio
- You have a version controlled project on GitHub which you want to integrate in Rstudio locally
- You have an Rstudio project that you now want to start version controlling
Creating a version controlled project in Rstudio from each of these scenarios is discussed in section 2: Starting a project. Exploiting Git’s features in Rstudio is further exploited in section 3: Exploring Git’s integration in Rstudio.
We will exploit the repository that we created in the previous chapters of this tutorial. A sample repository is also downloadable here. Download the repository as a ZIP-file and extract it.
2. Starting a project
2.1 Integrating a version controlled project in Rstudio (scenario 1 & 2)
Let’s start by making a new project (File > New project…). The following screen pops up:
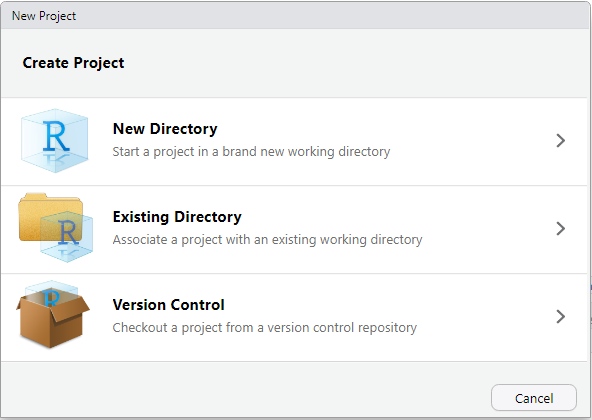
There are two options relevant for us to create a project in RStudio initialized with GitHub:
- Existing Directory: The preferred choice when a project folder already exists and which has previously been initialized with Git.
- Version Control: Ideally for creating a new R project based on a repository in GitHub.
Given the situation that there is a folder on our computer, created during this tutorial and initialized with Git, we will go for the first option. Select Existing Directory, browse to the location of the project folder and create the project. (If you’ve downloaded the sample repository mentioned above, this option does not hold as it only downloads the files)
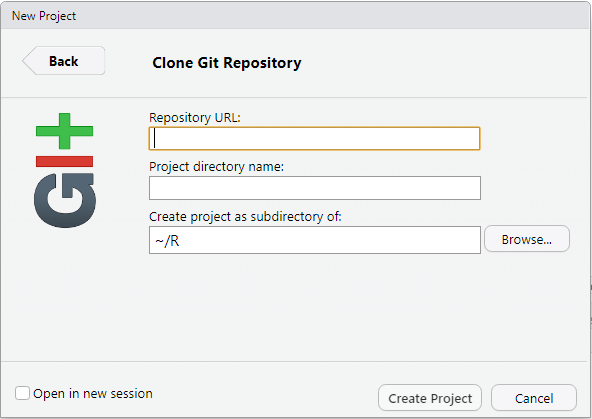
Alternatively, if we were to choose to create a new R project based on a GitHub repository, you would need to select Version Control, followed by Git and then copy the link of the GitHub repository from the green Clone or Download button and add it as the repository URL, and finally create the project. Using the sample repository for this option would mean that we need to fill in the following link as repository URL: https://github.com/vibbits/introduction-github.git.
Notice that after creating the repository, a .gitignore file is added on the fly containing the following 4 lines. These lines will make sure that irrelevant information related to Rstudio is neglected.
.Rproj.user
.Rhistory
.RData
.Ruserdata
2.2. Initiating version controlling on an existing Rstudio project (scenario 3)
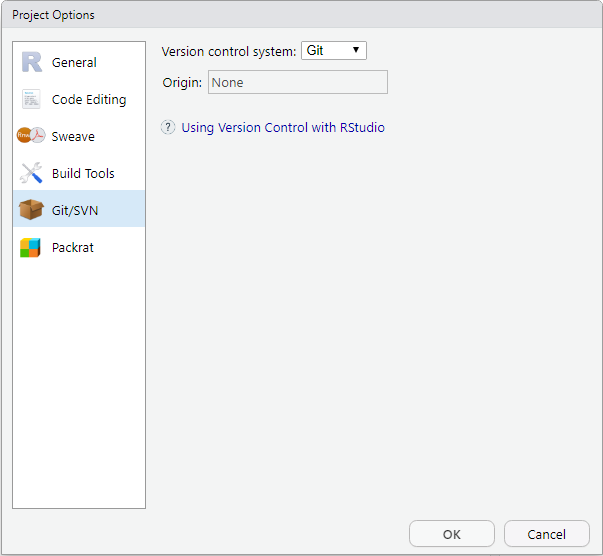
A third option assumes that you already have an R/Rstudio project. Click on Tools > Version control > Project Setup…. In the new screen, select Git as the version control system as depicted below and select yes when asked “Do you want to initialize a new git repository for this project?”. Rstudio will need to restart for the changes to take place.
This approach will initialize Git on the project. As discussed in chapter 3, this local repository does not exist on GitHub yet, hence we can’t push our commits to GitHub. In order to do so, we’ll have to make a repository on GitHub first (see chapter 3.2.). This repository should be initialized without(!!) a README file, .gitignore file or license. Copy the link that GitHub created for the new repository (e.g. https://github.com/vibbits/rstudio-project.git). In Rstudio, find a Git tab in the upper right corner and click on New Branch (or the icon next to it).

Click on add remote in the new screen, paste the GitHub link and add the name of the project.
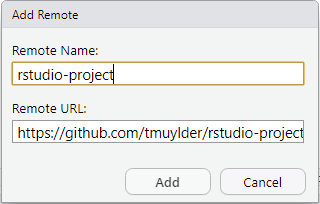
Finally, add the name of the new branch main and hit create. Select overwrite when asked.
3. Git’s features in Rstudio
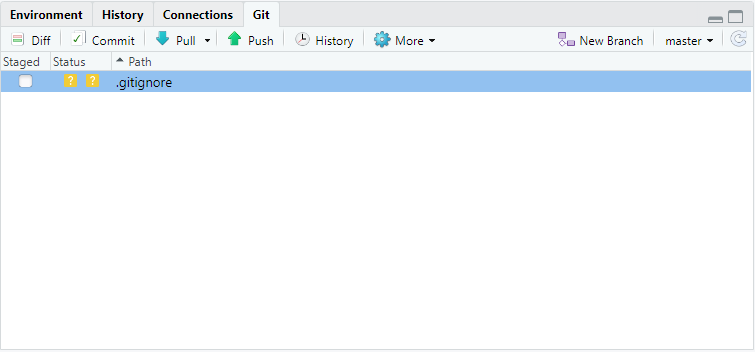
By initializing Git on an Rstudio project, there appears a Git tab in the upper right corner as depicted below. The tab consists of the main actions that can be performed with Git (the window might be too small to contain the keywords related to the symbol). Neglecting the diff keyword which is out of scope for this tutorial, we can find the following actions: Commit, Pull, Push, History and More followed by New Branch, the name of the branch (main) and a refresh button.
- Stage: The only action we’re missing is the staging. Rstudio & Git actually continuously process the files within the project searching for new changes. If there is a new change it will appear in the list in the screen as depicted here for the
.gitignorefile. - Commit: Opens a new screen that controls the staging area and committing.
- Pull: Pulls upstream changes from the GitHub repository into our, this local repository.
- Push: Pushes previous commits to the GitHub repository.
- History: Neatly visualizes the history log of the repository. Each commit, branch, contributor is reviewed in this screen.
- More: Allows us to revert (undo) changes to a previous commit or ignore selected files (discussed below).
- New Branch: Creates a new branch.
4. Routine usage
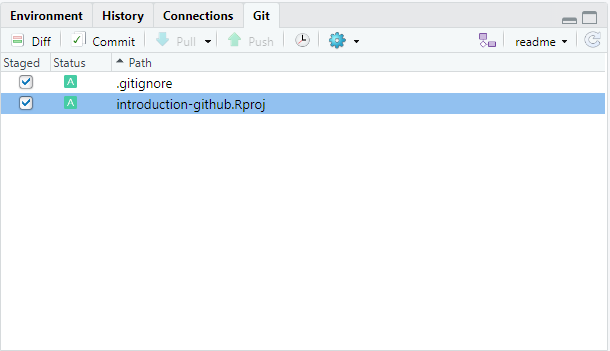
Recall the routine usage: stage-commit-push. Staging changes in Rstudio is done by simply checking the tickmarks in the list. This approach makes it very user-friendly to stage changes that are related with each other and that should be contained within the same commit.
Subsequently, click on commit and find a similar screen:
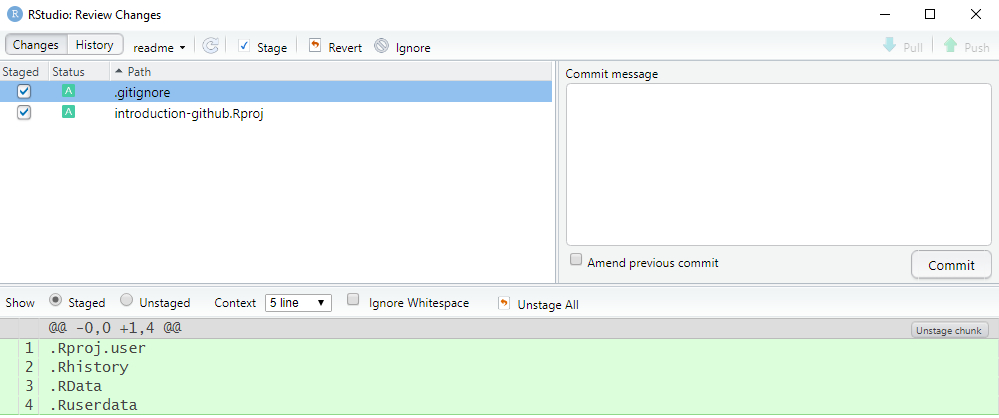
Let’s explore this screen for a while:
- We can find a history tab summarizing all the previous commits in this repository. As this project already existed before, it also contains the commits from before the integration in RStudio.
- Next to that tab we can switch the branch, generally we leave this untouched as we’re already in the preferred branch.
- The staging tab allows us to stage and unstage specific files, even after they were staged in a previous step.
- The revert tab is neglected in this tutorial
- Ignore allows us to edit the
.gitignorefile by simply selecting the file that we want to ignore and clicking on Ignore.
If you’re happy with the changes and the staging area, a commit message is written in the right tab and finalized by hitting the Commit button. A message will pop up summarizing the commit in a technical way.
If the commit has to appear on GitHub we need one more step. Click on Push and find your new status of the project in the GitHub repository.
hands_on Exercise
Add the
.gitignorefile to the staging area and exploit the Ignore button to add the Rproj file to the.gitignorefile. Write a commit message, and commit and push your changes to GitHub. If the Rproj file already is in the.gitignorefile, make a new example R-script which you can ignore.solution Solution
Select File > New File > R Script, write something like
# testand save the file. When they are saved, they will appear in the Git-tab. Select the files in the Git-tab and click on More > Gitignore. When you do this, the explicit name of the file will appear in the gitignore file. Click on Save. Now the gitignore file will apear in the Git-tab, ready to be staged, and the new file (or Rproj file) has disappeared from it. The rest of the workflow remains the same. Click on the tickmarcks to stage the files, click on commit, write a message in the designated textbox and push your changes to the repository on GitHub.